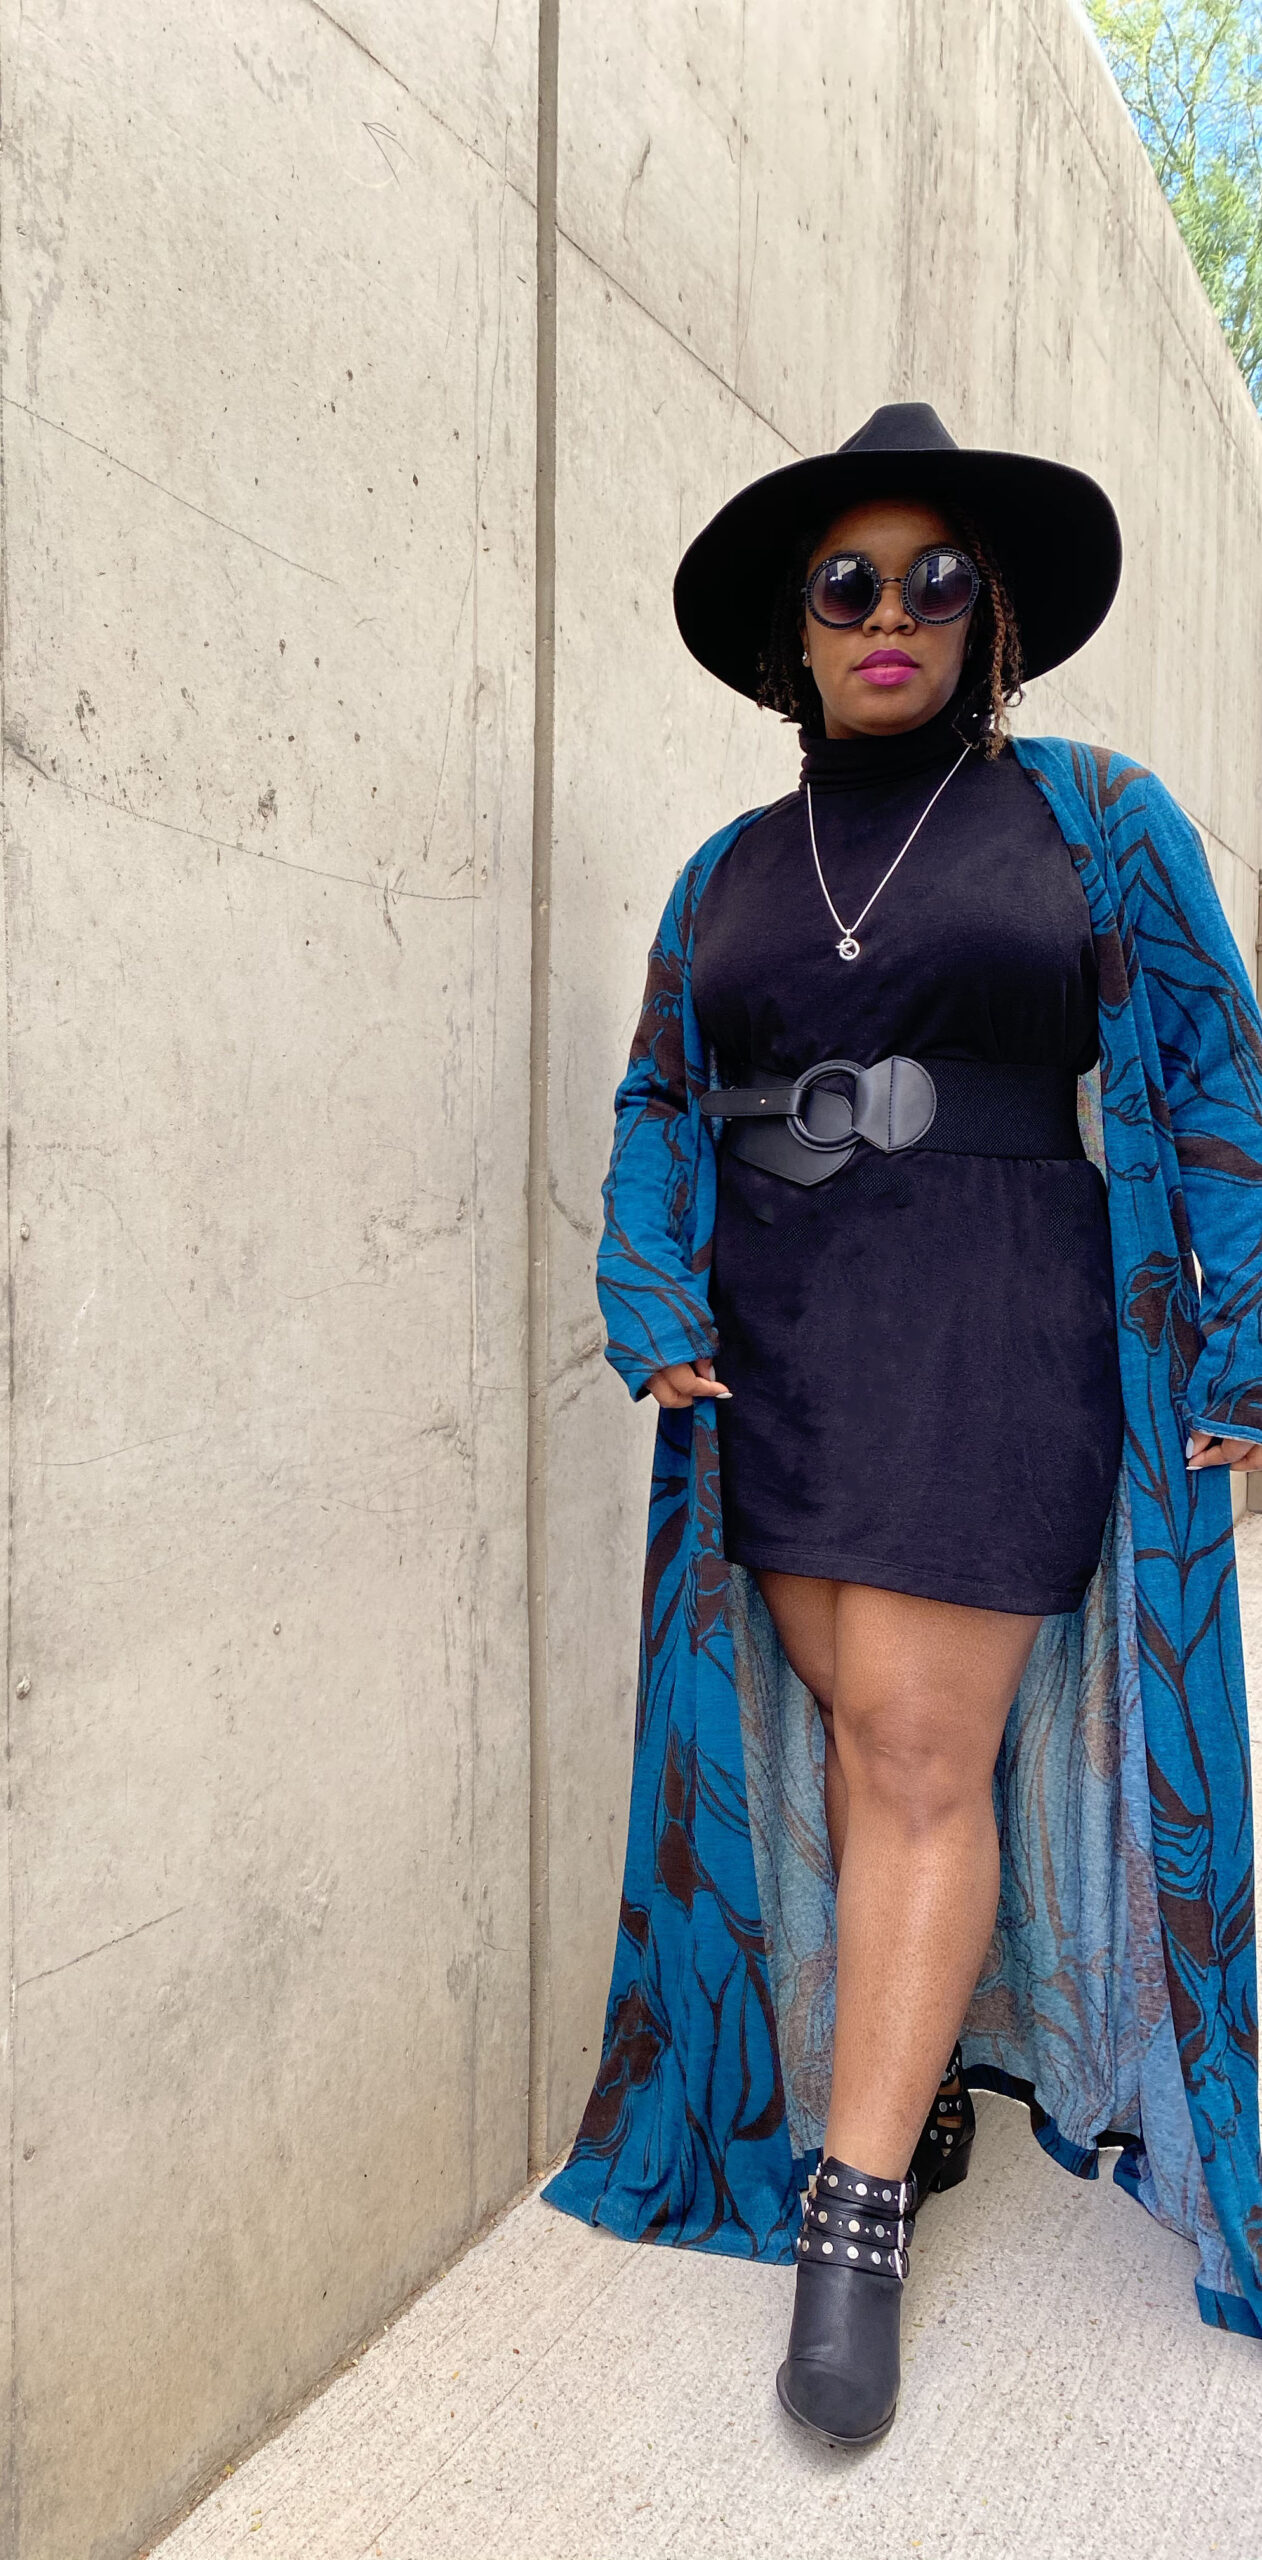
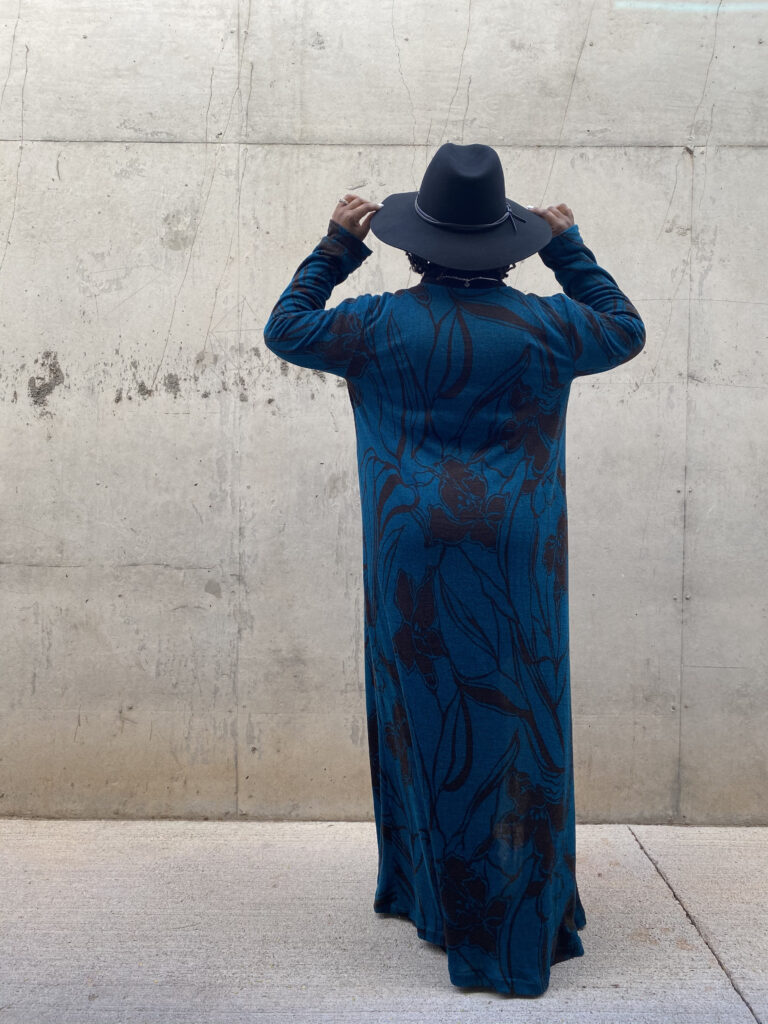
Hey you Introverts, have you ever found a pattern you loved, but didn’t want to make it out of stiff fabric with no give? I will walk you through how to adjust any sewing pattern from woven to stretch fabric. If you follow me on Instagram or on my Facebook page then you may remember the teal sweater knit fabric that you see here.

Earlier this year, I mentioned purchasing it from SAS Fabrics. This was at the Phoenix location off of Indian School if you’re curious. Let me tell you one thing I have been working on is my self-confidence with sewing. All the compliments in the world don’t mean anything if you don’t believe in yourself right?
Finally, I found the courage and made the duster I had imagined out of this fabric. I went back and forth for MONTHS about which pattern to use but it ultimately came down to how much fabric I had left. The person who cut my fabric wasn’t paying attention and there was a big chunk missing from the yardage, so I had to get creative with how I folded it.

I also had to get rid of some pattern pieces and choose a pattern that didn’t need a lot of fabric if I used knit. The pattern that I chose was Simplicity 8059.
Disclosure: This post may contain affiliate links meaning I get a commission if you decide to make a purchase through my links at no cost to you. You can read my disclosure for more information.

Simplicity Pattern 8059 Misses Separates Sized XXS to XXL
As you can see from the image the initial pattern had a tie in the front. I nixed that idea because I wanted to be able to dress up or dress down the duster and the tie in the front screamed summertime to me. I definitely plan to make a summertime version of this pattern because it’s too cute not to; however, with winter here I wanted to have a duster to wear with some heels or ankle boots. There are so many ideas in my head with this pattern. I’m sure a remake will be on the blog soon.
Keep scrolling to see a few style options I have now and learn how to adjust any sewing pattern from Woven to Stretch Fabric.
Pattern Description: Misses Duster in Two Lengths, Pants, Pants, and Knit Dress or Tunic
Pattern Size Chosen: Medium (I usually choose large. I’ll explain later)
View: D
Fabric Choice: Sweater knit
Color: Teal with brown (looks black in certain lighting) flowers you can find a similar fabric HERE or HERE would be some good alternatives.
Sewing Tools Needed That Aren’t Mentioned:
- Walking foot
- Magnetic Seam Guide
- 75/11 sewing needle
- Polyester thread that matches the main color
- Gauge ruler
- Tailors Ham
- Seam Roll
- Scissors for cutting thread and ones for cutting fabric
- Care label and person brand label if you have one
- A good iron
- Pressing cloth (You can use cotton napkins or purchase a pressing cloth online)

Did it look like the photo/drawing on the pattern envelope once you were done sewing it? Not exactly. I made some changes to it.
Are the instructions easy to follow? Yes, the ones that I did follow definitely were.
What did you particularly like or dislike about the pattern? I loved how easy it was to put this all together. I was able to sew this in one morning between eating and running back and down the stairs to dress seams and hems.
Pattern alterations or any design changes you made
I was limited in the amount of fabric that I had so I didn’t cut out the neck and front-facing pieces. I also didn’t cut out the front ties. Here’s what I did instead:
- Cut out the front and back pieces
- Align the sleeve pattern sharp corners with the armhole of the front so that has many lines that can match up as possible. It even works with asymmetrical patterns like this.
- Sew the shoulder of the front and back of the duster together with right sides facing.
- Stay stitch the back from shoulder to shoulder (this will help prevent the shoulders from being weighed down and stretching out the neckline)
- Lay the fabric out flat and match the dots and notches of the sleeve to the armhole of the front and back.
- Clip/pin the sleeve to the front and back clipping were it is needed.
- Sew the top part of the sleeve to the body of the fabric
- Then, fold the sleeve with the right sides facing.
- Line up the seams under the arms and pin them in place
- Then sew down the bottom part of the sleeve and the side of the duster on both sides.
- Next, press the collar all the way down to the bottom of the garment by 1/4 inch and then turn over and clip/pin
- Stitch close to the edge of the fold to get a narrow stitch
- Do the same thing with the sleeve hem.
- For the bottom of the garment press the raw edge up by 1/4 and then press hem up by 1 inch.
- Stitch the hem close to the folded edge
- This next step is optional, but you can add a care tag so you remember how to wash it. For sweater knits, I always watch on cold and never put them in the dryer. I always let them air dry.

Each time that you sew a seam make sure you are pressing the seam open. This will give your garment a store-bought look instead of a homemade look. I love it when friends and family try to guess which pieces I bought and which are made by me. My husband still forgets sometimes when I put out an oldie, but goodie.
As a side note, you will notice that my duster is floor-length that was on purpose; however, if you are 5’2 or shorter like I am and want the same length as the model you will have to shorten the pattern before you cut your fabric. Most commercial patterns are made for taller women, so us Petites end up with extra fabric left over after shortening a garment. I hope to one day in the future have a pattern company that will cater to us and saves us some money from buying extra fabric we don’t need. Wish me luck with that.
Would you sew it again? Most definitely.

How long did it take? 2 hours including cutting and sewing and making adjustments.
Tips to avoid it taking as long: It actually didn’t take that long so the only tip that I have for you is to make sure to measure twice and cut once. Also, I advise going down a size that you would normally cut out. This way the garment isn’t stretched as you sew and can still remain close-fitting like it does on the model.


If you would like to find similar accessories to go with your custom duster I did a little digging for you. I will always try to do my best to find things under $100. See everything at once here: https://shopstyle.it/v/Uyc
I’d love to hear from you. Was that easy enough to understand or would you like a video tutorial to go with it?
Until next time…